DIY Industrial Wire Basket
I was recently on the chase for an industrial component (read: wire baskets) for a room in my home but became a niggling frustrated at the limited options. Either the baskets weren't the right size/dimensions (mostly the case), or they weren't the correct style, or they lacked character and charm. The options seemed a little expensive for my budget, as well. It was determined that industrial style wire baskets aren't actually all that complicated, and I could customize the size and shape I wanted…for pennies, really.
 View in gallery
  View in gallery
 If you're in the market for an industrial-type wire basket or two, here'southward an easy-to-follow guide on creating your ain. The materials are uncomplicated, and the process is piece of cake, and it will probably take you well nether an hr to create your own perfectly sized masterpiece. Here'southward how.
DIY Level: Beginner
 View in gallery
 Materials Needed:
- Wire mesh, fencing, or any type of cutting-to-size wire grid (example uses 2"x3" wire fencing)
- Can snips, or metal cutters, or nippers
- Measuring tape, protective gloves, and pliers
 View in gallery
 Before you brainstorm, you'll demand to know the dimensions you want your finished wire basket to be. This case shows how to create a basket 8"d x 14"w 10 8"h, although those measurements tin can of form be customized to adapt your specific needs.
 View in gallery
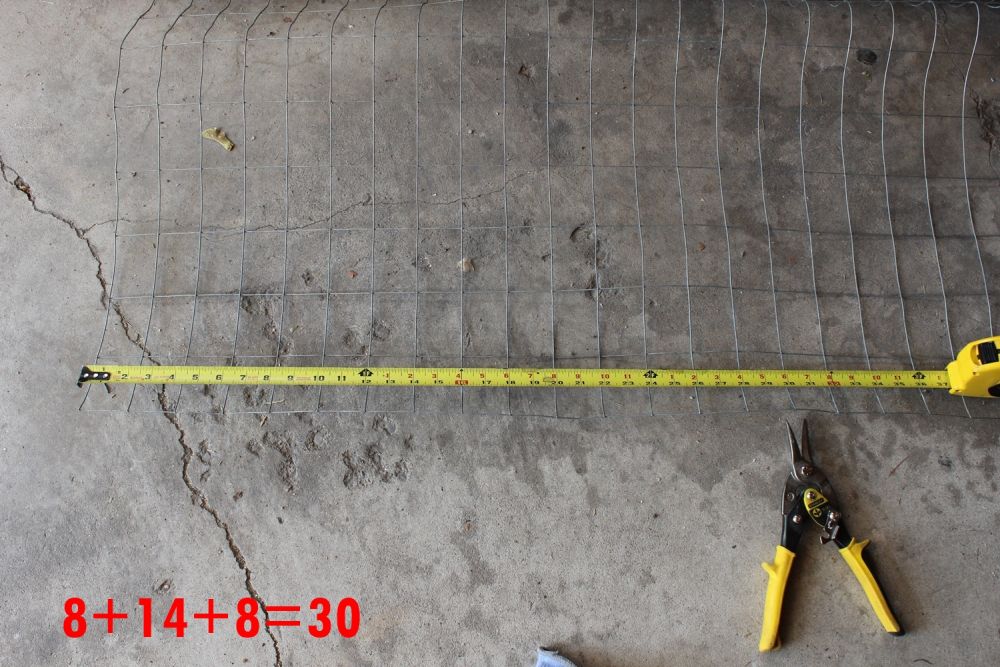
 Flatten your gyre of wire fencing, and measure out your starting time length. This will be: height + width + top.
 View in gallery
 Notation: You'll actually need your dimensions to piece of work out with your wire fencing then that in that location's a "finished" edge along your basket. Snip the wires Exterior this measured length (in this case 8+14+eight=xxx"), directly next to the perpendicular wire.
 View in gallery
 Adjacent, you'll need to cut the back side of your wire fencing at the place where pinnacle + depth + meridian is. Over again, be sure the measurement ends upwardly along a solid wire.
 View in gallery
 Snip your wires forth this measurement (in this instance, 8+8+8=24").
 View in gallery
 Yous should now have a rectangle (or square) with all sides of solid wire.
 View in gallery
 It's time to create the actual basket. To do this, nosotros'll need to cutting out the corners of your wire fencing rectangle. Measure in from 1 edge the tiptop you desire your finished wire handbasket to exist (in this example, viii").
 View in gallery
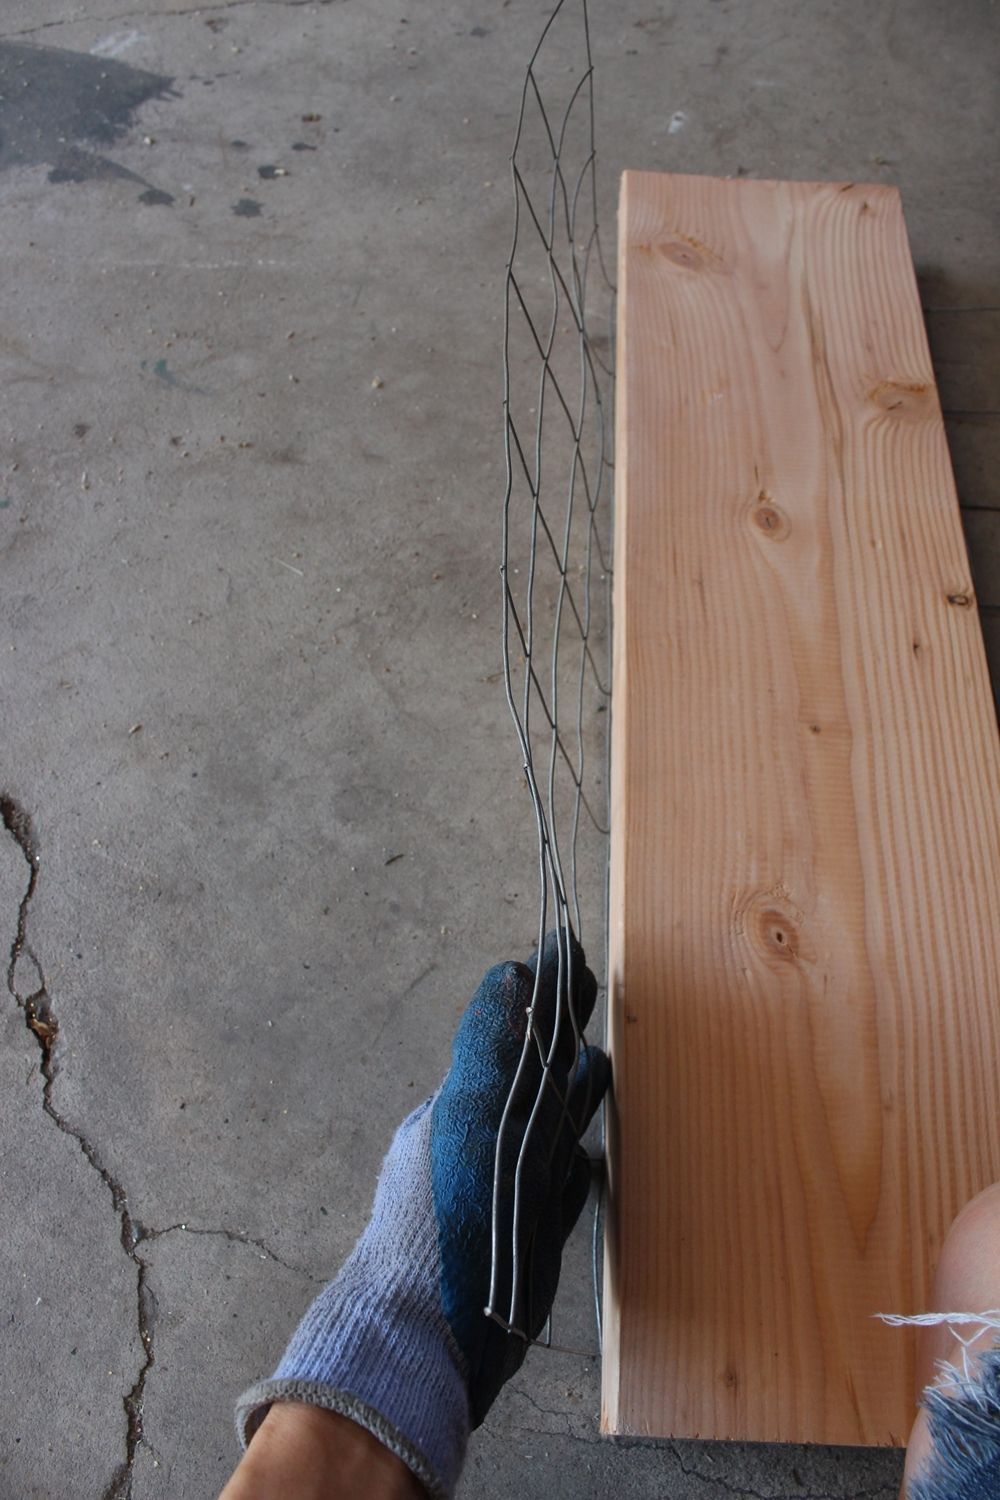
 Lay a board direct across this spot to aid you in creating a clean, ninety-degree curve in the wire.
 View in gallery
 Push button the wire snugly against the side of the board to create a crisp angle.
 View in gallery
 Do this for the other side of your basket; mensurate your height (in this case, 8") in from the opposite finish, place your board, and bend the wires along the lath.
 View in gallery
 You should have a sort of U-shaped wire fencing form at present.
 View in gallery
 Turn your U-shaped class sideways, and measure your height (in this case, 8") in from one stop. Information technology should be noted that these measurements needn't fall direct onto a solid wire; they can "float" in the eye of the fencing grids and exist perfectly okay.
 View in gallery
 Take your can snips and cut the wire 1" further out from your measurement (e.g., where the ruby arrows are in this photo, NOT where the tin snips are). So, for case, if you measured eight" in from the end of your form, you would snip the wires at 7" in from the end. This will allow you to accept 1" of wire to connect to the other side at the corner of your wire handbasket.
 View in gallery
 Only cutting the wires on the side itself; don't cut whatever wires along the lesser of your wire basket, even if information technology's a wire that's at the corner.
 View in gallery
 It's now fourth dimension to cut wires along the corner of your basket until you reach your peak-minus-1" (in this case, 7") mark. If this happens to autumn along a solid wire, cut on the OUTSIDE of the wire. Remove the section of wire you've cut out.
 View in gallery
 Repeat for the opposite corner.
 View in gallery
 Place your board at your superlative mark (in this instance, the viii" mark) in from the side of your basket.
 View in gallery
 Bend the wires to create the side of your handbasket.
 View in gallery
 Flip your handbasket over, and continue pressing the wire bends to create 90-degree angles.
 View in gallery
 Align your basket sides together. Determine where, on both sides of the corner, the wires should meet.
 View in gallery
 Bend the protruding wires at the corner joint point. I've found that it'southward amend to err on the side of leaving a footling extra length before the bend, because the wire connection volition naturally pull the wires a petty tighter.
 View in gallery
 Wrap the ends of your protruding wires tightly around the connection points. Don't worry if in that location's a petty extra wire sticking out; these points will be trimmed after. Use pliers when necessary to get the wire wrapping tight and snug.
 View in gallery
 Repeat for both sides of your wire basket. You're well-nigh done, and it'south really starting to accept shape, isn't it? Looking great!
 View in gallery
 Echo the measurements and snips and wraps for the other side of your basket.
 View in gallery
 Use tin snips to clean up any bits of wire sticking out.
 View in gallery
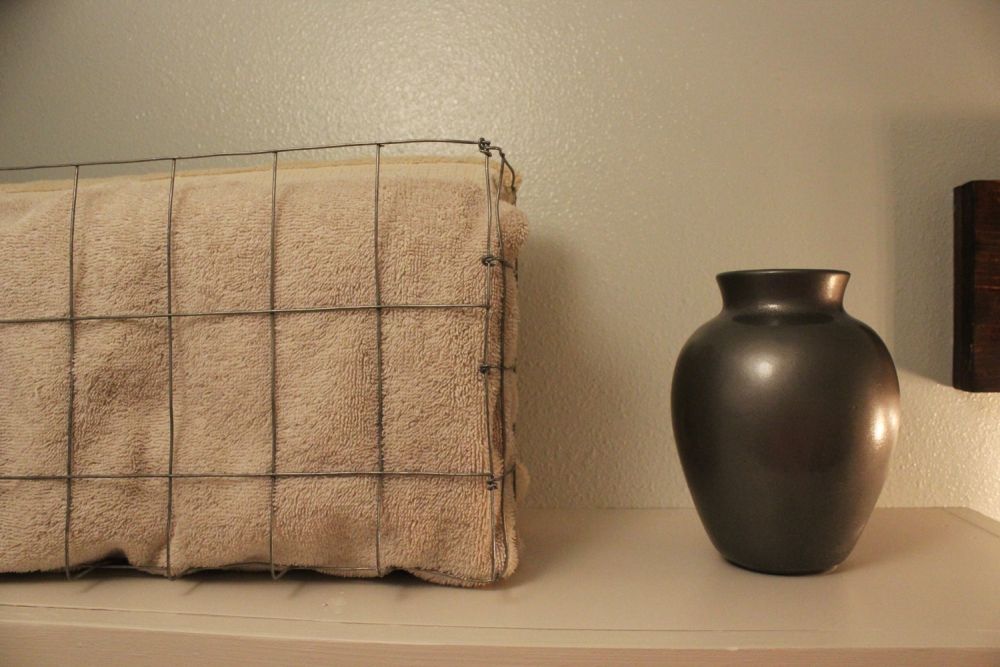
 Throw some towels (or any) into your new industrial wire basket, and you're done!
 View in gallery
 If you're looking for a piece to add together to the industrial vibe (or create it from scratch) of whatever space, including the bathroom, this DIY wire basket is just the thing.
 View in gallery
 This is actually the perfect size (called strategically) to easily house 2 or 3 folded bath towels.
 View in gallery
 Sometimes (oft) the simplest pieces are the ones that pack the most visual punch. Wire baskets, crates, or boxes are just such a power piece.
 View in gallery
 And if y'all like the look of this DIY industrial wire basket on these chunky floating shelves, yous can learn how to brand floating shelves yourself, here! (Hint: They're not as difficult equally they might seem.) Relish!
Source: https://www.homedit.com/wire-basket/
0 Response to "DIY Industrial Wire Basket"
Post a Comment